

Classic Rice Krispie Treats made with rice cereal, marshmallows and a little extra love for Valentine's Day make a tasty treat.

Valentine's Day is coming up and though I don't usually make a lot of themed holiday recipes, my family does love Rice Krispie Treats.
So when our youngest was home from college over Winter break, I decided to whip up these treats with a little Valentine flair.
Our girls are now 25 and 20 so they're technically no longer children, but they'll always be my babies. Thankfully, they do like a fun dessert; especially around the holidays.
Rice Krispie Treats were always one of their favorites and they're so easy to make. The best part is that there is no baking required; which makes this a fun recipe to make with young kids (supervised of course!)
Everyone LOVED this fun, festive dessert and they were ready to eat in 1 hour.

Equipment
- Nonstick Pot or Dutch Oven
- Microwave Safe Bowl (for melting chocolate)
- Silicone Spatula
- 7x11 inch Nonstick Brownie Pan
- Cutting Board
- Knife
If you don't have a nonstick pan, you can line the pan with parchment paper.
Ingredients Needed
For this recipe you'll need the following ingredients:
- Rice Krispies Cereal (or other crispy rice cereal brand)
- Mini Marshmallows
- Butter
- Cooking Spray
- White Chocolate
- Canola Oil (if necessary)
- Valentine's Colored Sprinkles or Nonpareils
I find that the mini marshmallows melt easier, but you can use regular size as well. As for the sprinkles, anything that is red, white and/or pink will work.
How do you make Valentine's Rice Krispie Treats?
Start by melting the butter in the pot over medium high heat; then add the marshmallows. Spray the spatula with cooking spray and stir the marshmallows until they are melted; approximately 5-6 minutes.
Turn off the heat; then add the cereal and mix until all coated. Spray the brownie pan with cooking spray; then add the cereal mixture into the pan.
Spread evenly in the pan using the spatula or clean hands. I like to spray a little cooking spray on my hands and press down firmly to get into the corners.
Refrigerate for 25-30 minutes which will help them firm up. Right before you take the Rice Krispie Treats out of the refrigerator, melt the chocolate in the microwave in 15 second increments until smooth.
White chocolate can be tricky to melt depending on the brand of chocolate and may become "clumpy". If this happens, add a drop or two of oil and mix well. This will help thin out the chocolate.
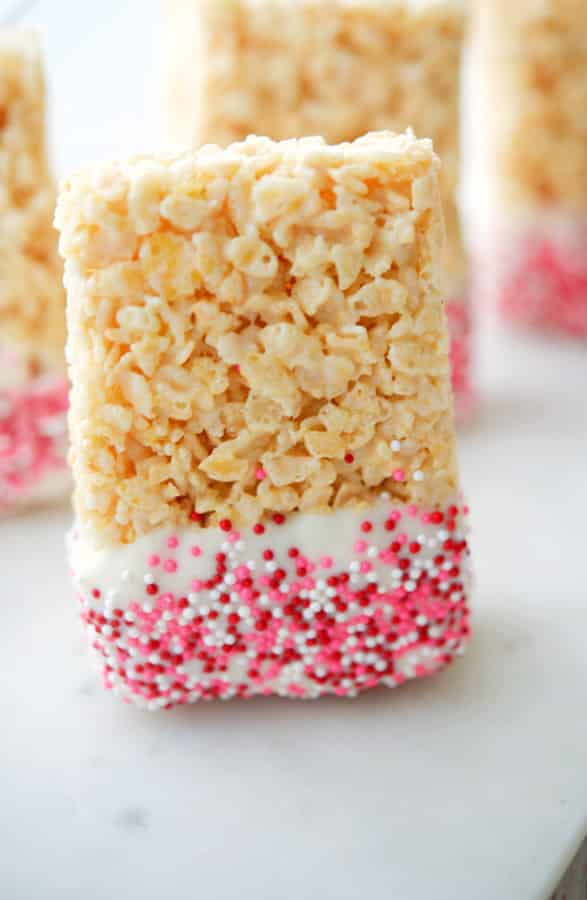
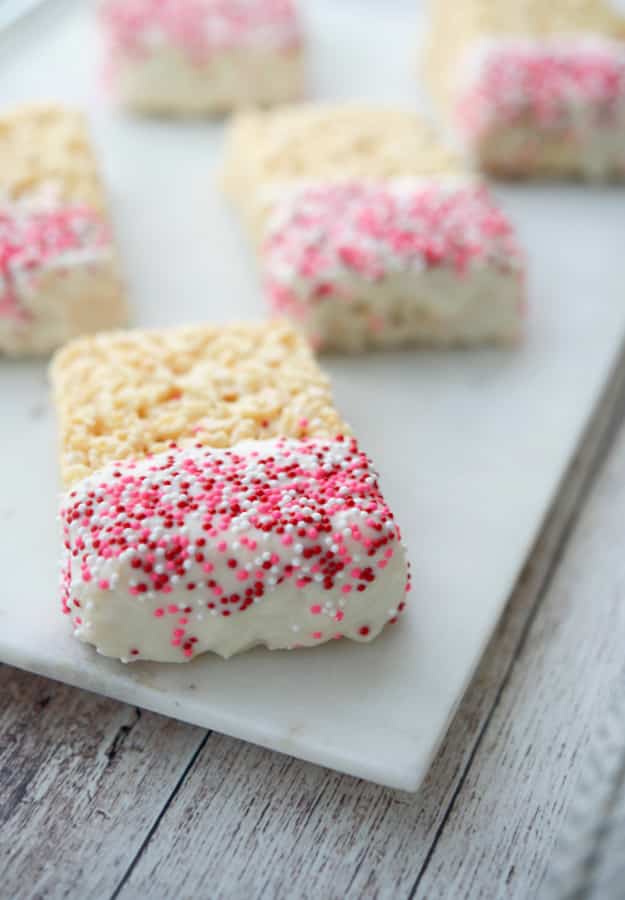
Take the treats out of the refrigerator, remove from the pan and place on a cutting board. Using the knife, cut them into eight equal pieces. Dip one end into the melted chocolate, coat with sprinkles; then lay flat to dry.
I don't recommend using a cooling rack as it will be hard to remove them once the chocolate has hardened. Repeat for all pieces; then allow to rest until the chocolate has solidified. To speed up the process, you can also put them in the refrigerator for 5-10 minutes.
Storage
These were so good and make a tasty Valentine's Day dessert. They're also gluten free if you watch the brand you purchase.
You can store these Valentine's Rice Krispie Treats in an airtight container at room temperature for up to 1 week.
VISIT THE RECIPE INDEX TO SEARCH FOR MORE RECIPES!

More Valentine's Day Recipes
- Frozen Banana Pops
- 19 Peanut Butter Dessert Recipes
- Marshmallow Pops
- Cheesecake Coated Strawberries
- Raspberry Mousse Heart Chocolates
- 5 Sample Valentine's Day Menu Ideas
SIGN UP FOR MY WEEKLY NEWSLETTER AND RECEIVE A FREE EBOOK!

Valentine's Rice Krispie Treats
Equipment
- Dutch Oven (or nonstick pot)
- Microwave Safe Bowl (for melting chocolate)
Ingredients
- 3 tablespoons butter
- 10 ounces mini marshmallows
- 6 cups Rice Krispies cereal (or other crispy rice cereal brand)
- cooking spray
- 2 cups white chocolate
- 2 tablespoons canola oil (if needed)
- Valentine's colored nonpareils (or other sprinkles)
Instructions
- Melt the butter in the pot over medium high heat; then add the marshmallows. Spray the spatula with cooking spray and stir the marshmallows until they are melted; approximately 5-6 minutes. Turn off the heat; then add the cereal and mix until all coated.
- Spray the brownie pan with cooking spray; then add the cereal mixture into the pan. Spread evenly in the pan using the spatula or clean hands; press down until firm. Refrigerate for 30 minutes until set.
- When ready to decorate, melt the chocolate in the microwave in 15 second increments until smooth. If needed, thin out with 1 tablespoon of oil until the chocolate is thin enough to dip into.
- Take the treats out of the refrigerator, remove from the pan and place on a cutting board. Using the knife, cut them into eight equal pieces.
- Dip one end into the melted chocolate; then coat with sprinkles. Repeat for all pieces; then allow to rest until the chocolate has solidified.


Leave a Reply